How to Build a Mobile App
The success of any app depends on two things: how well it meets the needs of its target users and how enjoyable it is to engage with. But this...

Wireframing can seem daunting to someone who has never created one before. But at the end of the day, a wireframe is just a loose draft of what an app’s screen could look like.
They are the sketches that guide the design and development of the completed app. Think of it as a blueprint for a house. It’s easy to see where the kitchen is going, but you don’t know what color the walls will be or where the spice rack will live.
Wireframes don’t get into the nitty-gritty of design work, that’s best left for the next stage in building an app. It is much easier though to make choices about fonts and theme colors knowing the general layout. The key goal with a wireframe is simply to create a roadmap for all designers, developers, and stakeholders to reference when building the final app. The first step is putting that pen to paper.
A wireframe is the outline of the overall structure of the various screens of your app (or website), like a blueprint. It is an illustration of the overall layout of a page.
It’s one part of the overall steps to building a mobile app. This makes it easy for both graphic designers and developers to understand what your app does and how everything is supposed to look.
Think of it as sketching out how the different kinds of data (text, images, buttons, navigation, etc.) will be rendered on each screen. When wireframing an app, you want to avoid the details and focus on the big picture.
Whether you’re doing this with a team or by yourself, the central focus of this activity should be about the layout and navigation of each screen, not the colors, font choice, images, or graphics. That comes later in the UI design stage. Wireframes for your app are like color-by-numbers. They create the picture’s outline, so graphic design can know where to put the color blue.
Though very similar, a storyboard is typically used to depict an animation or film sequence, like a scene in a movie or a graphic novel. Whereas storyboards might be used when creating a play, wireframes are used in tech and UX/UI work, as it’s more important to establish a screen layout as opposed to a scene.
Ideally, wireframing comes before a prototype. In fact, a prototype is simply a detailed representation of a wireframe. If the wireframe establishes the formatting for an app, then the prototype is what would show the specific images, theme, colors, and stylistic choices that fill in the feature sections laid out in the wireframe.
Wireframes serve a few purposes. On one hand, it saves a lot of wasted hours in the UI design and UX development stages. Wireframing forces us to think about how certain features would fit on the screen. If there is a problem with a software idea, it’s much better to catch it at this stage while it’s easy to fix. It would take a lot more time and effort to redo a fully designed homepage to accommodate a feature change than to look at a sketch and realize the design needs to be tweaked. As well, making specific design choices becomes easier, since the designer doesn’t have to create the layout while choosing the specifics.
The more accurate a wireframe can be, the easier it is to develop a prototype (or MVP) with minimal mistakes. As well, it gives a shared framework for all stakeholders to reference during development, helping ensure everyone is on the same page.
It also makes it easier to talk about the actual app concept, without getting sidetracked by focusing on graphics, fonts, and color schemes.
If you need further proof of why Wireframing is an essential practice, just read Michael Flarup’s comment in his article for Smashing Magazine:
“The single reason why most apps I’m pitched don’t get off the ground is because it is entirely more compelling to talk about the overall idea of an app instead of asking the tough questions and getting into the gritty details of how to execute it.”
If you haven’t drawn a wireframe for an app before, you can reverse engineer a familiar app for practice. Pick one path of action, such as logging in to the app, and then draw a simpler version of each screen during this process. If you do enough of this, you’ll be able to understand the common practices and UX patterns that apps have and people expect.
If you already have the software idea and need to jump right into creating the wireframe, then you can follow these steps:
It’s easier to draw wireframes if you’re not making assumptions about details. Before your pen ever outlines the first box, ask the important questions. Who will be using this software or app?
Creating user personas can provide context for a screen’s layout. For example, if an app is geared towards elderly users, then a wireframe could be made to display fewer features on each screen to accommodate weaker eyesight.
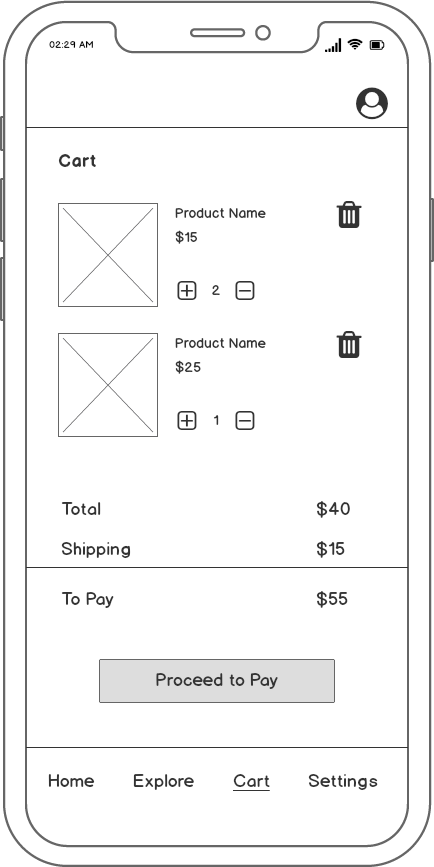
Also, it’s important to make sure you’re crystal clear on the UX for the software. There is a big difference between talking about a website that lets you buy and sell homemade dog collars compared to asking how would a user add a dog collar to their cart? Knowing the specifics will make your wireframes accurate, as all steps in a process are known.
The terms user flow and wireframe are sometimes confused, but the devil is in the details. A user flow should come before a wireframe.
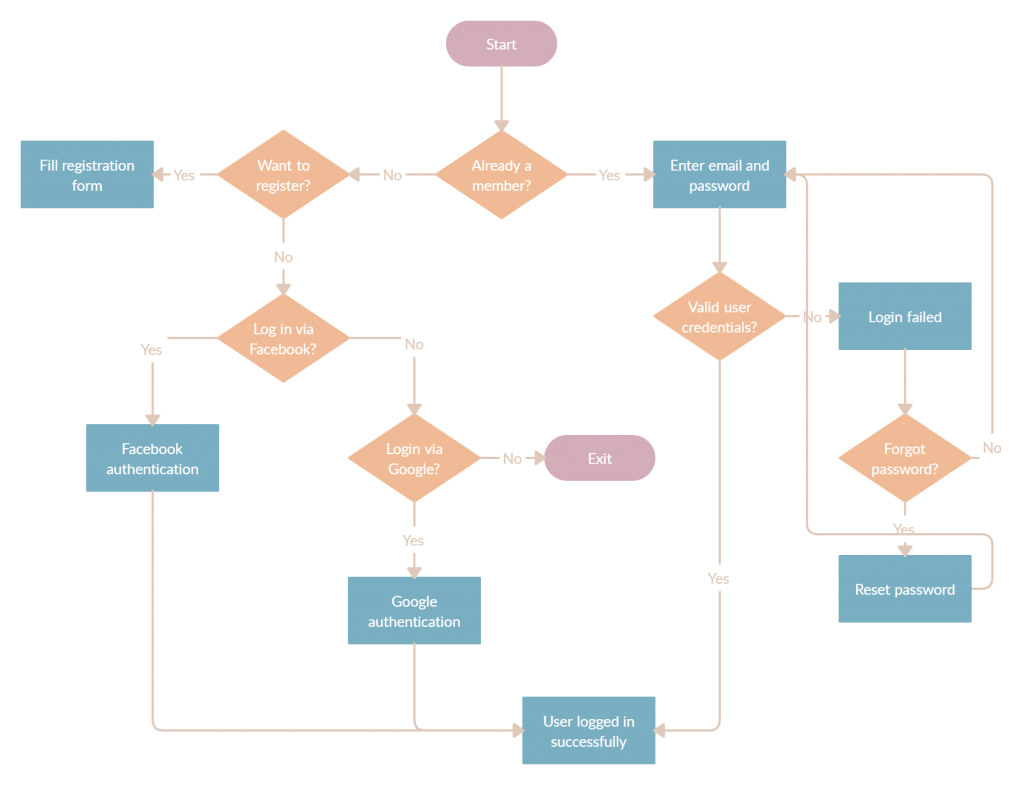
A user flow lays out the path that a user might take. For example, after someone logs in to the application, do they see the homepage or their profile page? If a person intends on updating their account information, how would they navigate to the right spot, and how many steps does it take? User flows use basic shapes, such as a pill button to indicate a start/endpoint and a diamond where users make decisions to create a nice map of the software. Use the below picture as an example:
Once the possible user flows are decided on, wireframing comes in. This takes those same pathways and creates a blueprint for how that screen could look. Wireframing outlines where features, pictures, and buttons, for example, should live on the page. It takes the basic instruction set by the user flow and gives it some visual structure. It’s important to note that wireframing stops with simply determining the placement of these features, not how the features should look.
Simple can be effective and there’s nothing simpler than paper and pencil. This avoids applications or other sophisticated software getting in the way or adding friction to accomplishing the task at hand.
However, if you have a lack of confidence in your art skills, there are programs to help. Wireframe software ranges in sophistication. If you want to get creative, screens could be made up in user-friendly Canva. For wireframe-specific software, programs like Invision Freehand, Sketch (only for Mac OS), and Justinmind make it easy. They function as a digital whiteboard with tools ready to help the creative juices flow. Even Figma and Adobe XD, which is used by professionals, is accessible enough to be learned by a beginner but powerful enough to accomplish everything you need.
Collecting all the above information like user flows and user personas and determining your framing tool lays out a solid foundation for creating the actual wireframe. The dots are there, they just need to be connected.
Almost always, you’ll begin by outlining the screen- typically a horizontal rectangle for a website/computer-based software and a vertical rectangle for an app.
Now, focus on one action a user could take, such as posting a review of a restaurant and imagine the very first step in completing that action. What would the user need to see on that screen? The user flow stated that people must first go to the restaurant’s profile. On this page, they hit a “leave review button.”
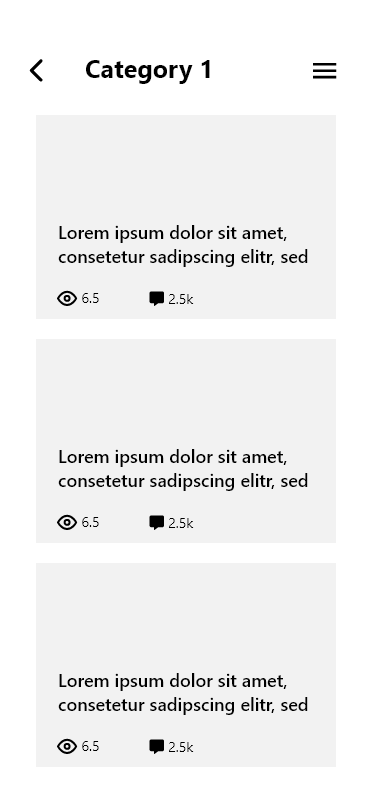
So we can imagine on this one screen, a user might see an image at the top of the screen of the restaurant. Below is the restaurant’s 1-5 star rating. To the side is a button that says “leave a review.” The bottom half of the screen is listing reviews with comments.
These are all illustrated on the wireframe with simple shapes in the frame indicating where these features are placed. It does not need to be more complicated than that as a wireframe is for formatting purposes.
For each screen, try to sketch out five or more ways everything could fit together. In true brainstorming fashion, set a timer and churn through variations of each layout so you don’t lock yourself into anything too soon. Don’t judge them now, you’ll have plenty of opportunities to be critical later.
We’re reaching the end of our wireframing journey. Each screen is wireframed and the storyboard is laid out. The last step is to add annotations to each screen that describes what each element is and how it functions. However, if you’ve done a thorough job with the wireframes, you may not need to add too many notes to them.
If you want a crash course in writing notes for your wireframes, Boxes and Arrows has a great article called “Writing Smart Annotations”.
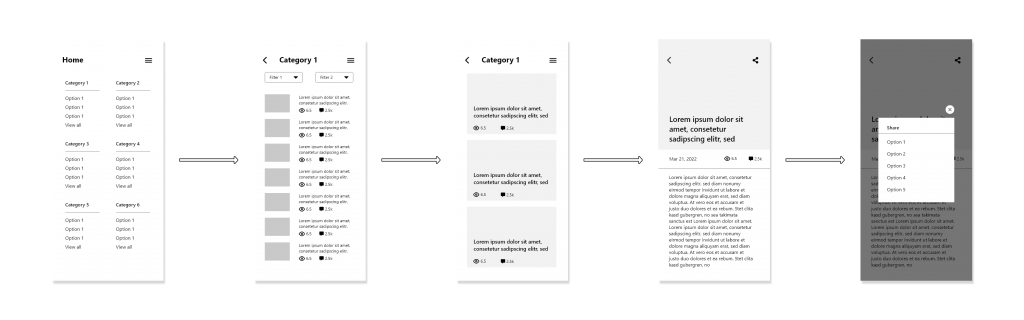
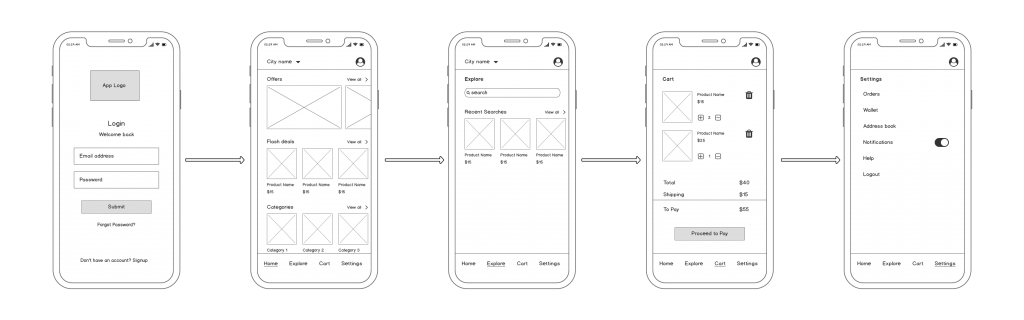
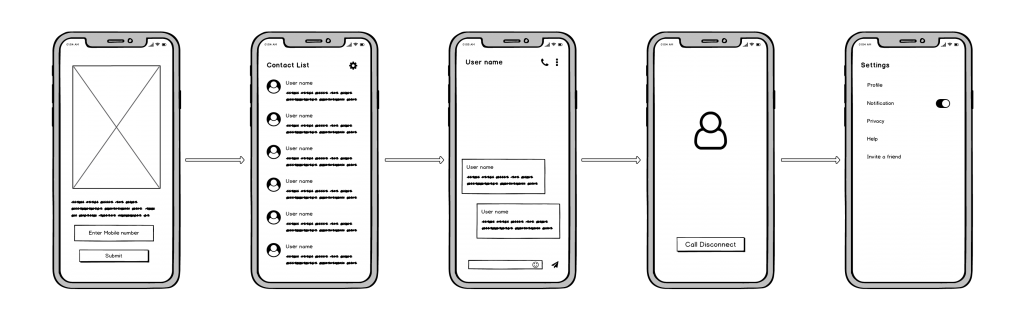
Sometimes it’s easier to understand what a wireframe is and how to make it by looking at a few examples to copy, while you get started.

Finally! Now that you have a complete set of wireframes you can present them to your designer or developer to create a prototype for your app. Though each development company works differently, what we recommend is first starting with the UI design, as opposed to working in tandem.
Should any kinks have made it through this far in the process, they’ll be caught in the detailed design phase where it’s easier to fix. Also, it allows one more stage to check to make sure the wireframe and user flow works cohesively with the UX features while allowing for easy changes if they don’t.
The prototype is where the app starts to come to life, but it can’t be made without the important wireframe component.
Explore Designli's Mobile App Development Services →
You might also like:
Subscribe to our newsletter.

The success of any app depends on two things: how well it meets the needs of its target users and how enjoyable it is to engage with. But this...

When you think of building a mobile app, it may be hard to know where to start. Maybe you can’t grasp what it will look like and if the end product...

When it comes to designing, building, and launching your first mobile app there is a lot to consider. And when it comes to the success of your app...
Post
Share